Staking has become one of the most popular ways to earn a yield on crypto without actively trading. Yet many beginners are unsure how it works and whether they should stake on an exchange or through their own wallet. This guide demystifies staking, explains the difference between custodial and non-custodial approaches, and shows you how to get started. As always, this content is educational and not financial advice.
What is staking?
Most modern blockchains use Proof of Stake (PoS) instead of Proof of Work. In PoS systems, validators lock up (stake) their tokens as collateral.
The protocol selects validators to propose and attest to new blocks based on the amount they have staked and randomization. If a validator acts maliciously or goes offline, a portion of their stake is destroyed (slashing). This economic penalty secures the network without burning massive amounts of electricity.
Compared with Proof of Work, PoS consumes about 99.95% less energy and allows more people to participate in securing the network.
When you stake tokens, you are either running a validator yourself (advanced) or delegating your tokens to someone who does. In return, you earn a share of the network’s block rewards and transaction fees. Staking rewards vary by network and may be locked for a period of time (unbonding). Always research the protocol’s rules before committing funds.
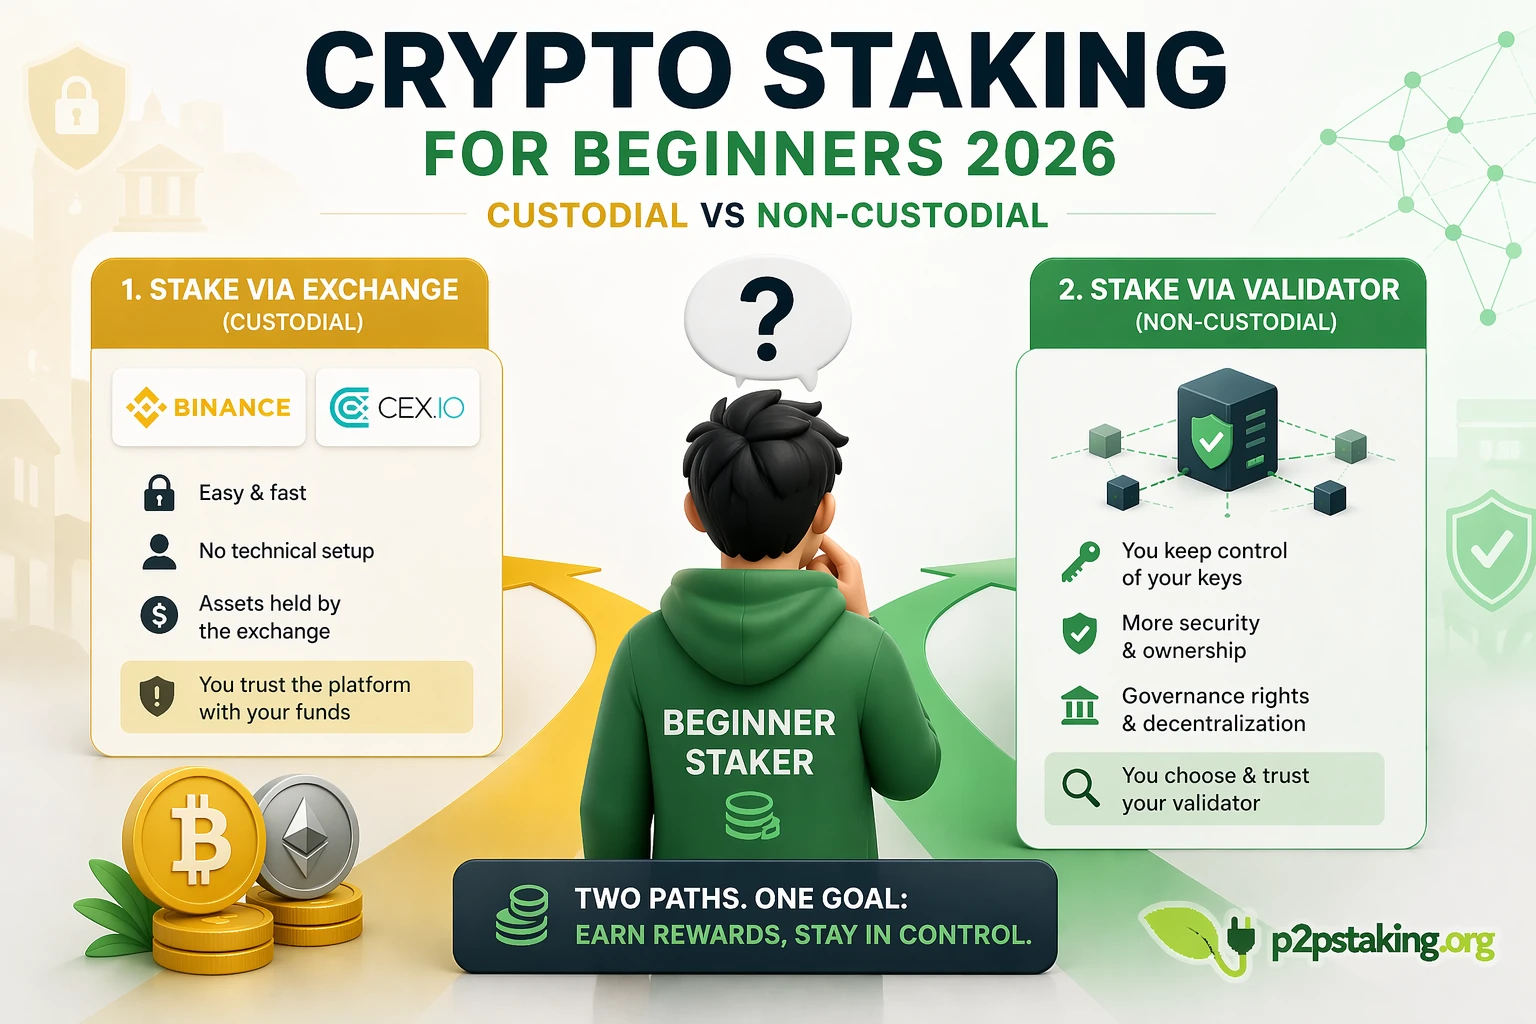
Custodial staking: simplicity at the cost of control
Custodial staking refers to staking services offered by exchanges and other intermediaries. Platforms like CEX.IO and Binance allow you to earn rewards without managing nodes or private keys. They handle the technical work; you simply deposit your tokens and select a staking product. According to industry comparisons, custodial staking is popular because of its simplicity and fast access.
Advantages
- Easy to use – Everything happens within the same platform. You don’t need to set up a wallet, install software or learn command-line tools. This convenience appeals to beginners.
- Quick access – Depositing and staking are frictionless because your tokens never leave the custodial platform.
Disadvantages
- Loss of control – By staking through an exchange, you hand over your private keys and rely on their custody. If the platform faces a security breach or financial trouble, your staked assets may be inaccessible.
- Hacking risk – Exchanges are attractive targets for hackers. Even with strong security measures, breaches can happen. When you leave funds on an exchange, you expose yourself to account-level attacks like phishing or SIM swaps.
- Limited governance rights – Some staking services do not forward voting rights to delegators. You may miss out on protocol governance.
- Centralization – Centralized platforms concentrate large amounts of stake, reducing network decentralization and potentially undermining governance.
Custodial staking is therefore best for small balances and learning, not for long-term storage. As our self-custody framework notes, keeping large amounts on an exchange increases counterparty, account security and access risk.
Non-custodial staking: keep your keys
Non-custodial staking means you maintain control of your private keys while delegating to a validator. This approach is common on networks like Ethereum, Cosmos and Polkadot. You typically use a hardware wallet and a compatible interface (Ledger Live, Keplr, Phantom, etc.) to delegate your stake.
Advantages
- Full control – You remain the sole owner of your private keys and can move your funds at any time.
- Enhanced security – Without intermediaries, there is no single point of failure. Hardware wallets keep your keys offline and sign transactions internally.
- Governance rights – Delegating directly usually preserves your ability to vote on network proposals.
- Supports decentralization – By staking through diverse validators, you help distribute stake and strengthen the network.
- Competitive fees – Many non-custodial validators charge only a small commission on your rewards.
Disadvantages
- More steps – You must set up a wallet, secure your seed phrase and connect to a staking interface. This learning curve deters some beginners.
- Self-responsibility – You bear the risk of mistakes (losing keys, delegating to malicious validators, etc.). Take time to research validators and backup your wallet properly.
- Slashing risk – When you delegate to a validator, you are exposed to their operational behavior. If a validator acts maliciously or fails to meet protocol requirements (downtime, double signing, etc.), a portion of the delegated stake can be slashed. This does not only affect the validator’s own funds but also the tokens delegated to them. While major validators generally operate reliably, it is essential to research validator track records, uptime and reputation before delegating.
Despite the extra steps, non-custodial staking is the preferred method for large balances and long-term holders because it eliminates counterparty risk.
If you want to stake with p2pstaking.org, visit our validators’ page.
How to start staking on CEX.IO and Binance
If you want to dip your toes into staking without dealing with wallets, custodial platforms provide a simple entry point. Below is a general workflow; always consult each exchange’s documentation for the latest interface.
- Create and verify your account. Follow our guides for CEX.IO and Binance to register and complete KYC. Ensure you enable two-factor authentication and set up withdrawal whitelists.
- Deposit tokens. Use fiat on-ramps (bank transfer, card, PayPal) or transfer crypto from another wallet. Pay attention to deposit networks and memos to avoid losing funds.
- Navigate to the staking or earn section. On CEX.IO, staking products are listed under “Earn” and cover a handful of assets like ETH, SOL and ADA. On Binance, staking options are found under “Earn” or “Simple Earn,” with flexible and locked terms for dozens of tokens.
- Review terms. Check the estimated annual percentage yield (APY), lock-up period, unbonding time and early withdrawal penalties. Some products auto-renew; others pay rewards daily or weekly.
- Stake your tokens. Choose the amount to stake and confirm. Your rewards will accrue automatically. Remember: your assets remain under the exchange’s custody until you withdraw them.
- Withdraw to self-custody. Once you’re comfortable, withdraw your principal and rewards to a personal wallet. This step reduces custodial risk.
How to stake with a hardware wallet and validators
Non-custodial staking involves a few extra steps but maximizes security and ownership:
- Purchase a hardware wallet. Multi-asset devices like the Ledger Nano S Plus, Nano X and Flex support thousands of coins and come with USB-C or Bluetooth connectivity. Trezor’s Safe 3 and Safe 5 combine open-source firmware with secure elements.
- Set up your wallet. Generate a seed phrase offline and write it down; never store it digitally. Create a PIN and test your recovery by restoring the wallet before depositing funds.
- Fund your wallet. Withdraw tokens from an exchange to the corresponding address on your hardware wallet. Confirm the network and any required memos.
- Connect to a staking interface. For Ethereum, use Ledger Live or a Web3 wallet like MetaMask connected to a staking portal. For Cosmos or Polkadot, use Keplr or Polkadot.js. Select a validator (or multiple) and delegate your tokens.
- Monitor your delegation. Rewards are usually distributed automatically. Keep an eye on validator performance and slashing events. You can redelegate or switch validators at any time.
- Keep your device secure. Store your hardware wallet and seed backups in secure, separate locations. Update firmware only from official sources.
Delegating directly gives you peace of mind: you can always unplug your wallet and rest assured that no exchange or third party can freeze your assets.
Which method should you choose?
- For small amounts or for learning, custodial staking on CEX.IO or Binance provides a hassle-free introduction. Yields are convenient, and you can unstake quickly. However, limit your exposure and withdraw to self-custody once you understand the process. Small amounts can also be a good opportunity to experiment with non-custodial staking, test hardware wallet setups and build confidence managing your own crypto before handling larger balances.
- For meaningful balances, non-custodial staking is worth the extra setup. You retain full control and support network decentralization. Hardware wallets and staking interfaces have improved dramatically in recent years, making the process accessible even to non-technical users.
- Hybrid approach: many investors use both. They stake a portion on an exchange for convenience (e.g., flexible products) and delegate the rest via a hardware wallet for security. This approach balances liquidity with ownership.
Start staking today
- Open accounts on CEX.IO and Binance (optional) using our referral links. Experiment with small deposits and staking products.
- Invest in a hardware wallet and set it up properly. See our hardware wallet guide for device recommendations and setup tips.
- Delegate through trusted validators. You can use services like P2P.org or directly choose validators on your network of choice. Always research commission rates, uptime and community reputation.
- Stay informed. Staking rewards, lock-ups and network rules evolve. Follow official announcements and our tutorials to keep your strategy current.
By understanding the trade-offs between custodial and non-custodial staking, you’ll be able to earn rewards without compromising on security or autonomy.
Java‑certified engineer and P2PStaking CEO, I secure validators across Solana, Polkadot, Kusama, Mina, and Near. My articles reflect hands‑on wallet ops and real recovery drills so you can set up self‑custody safely, step by step.
Ready to Take Control of Your Crypto?
Go deeper into self‑custody, software wallets, hardware wallets, and practical guides.
