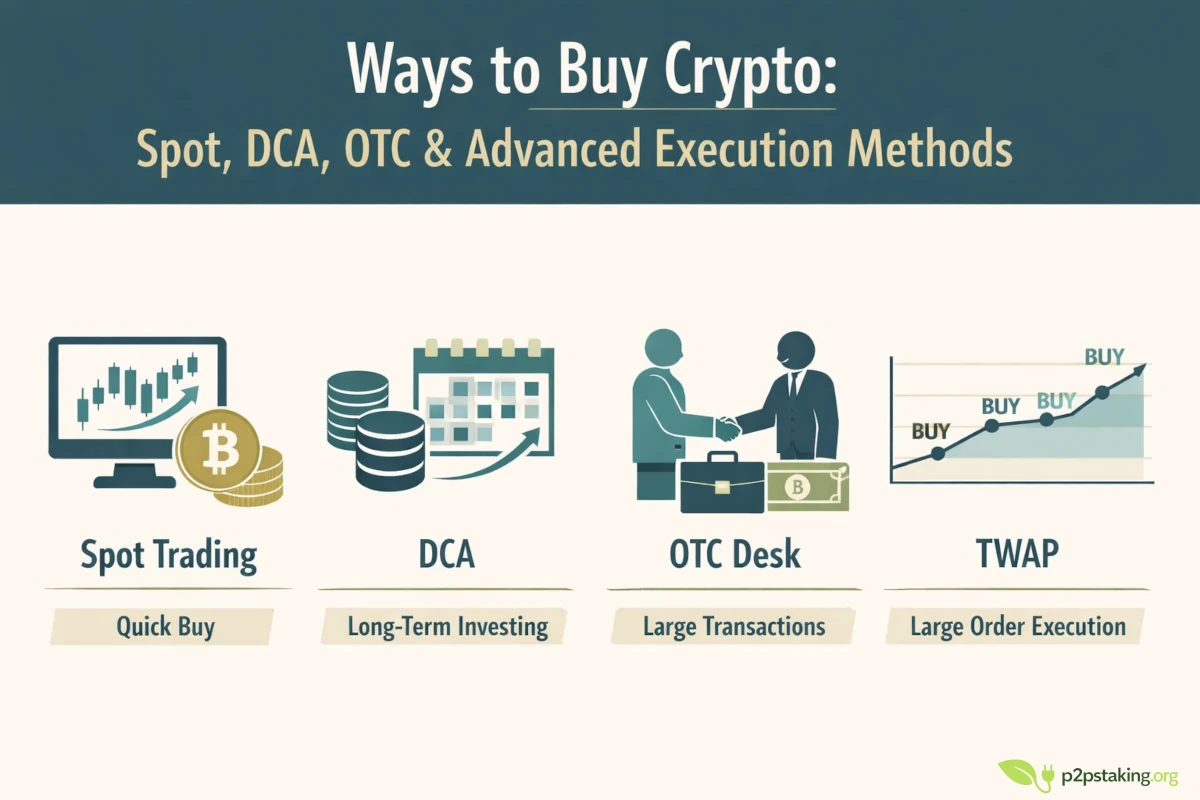
Quick answer (TL;DR)
This guide explains how to withdraw crypto safely—either from an exchange to an external wallet or from a wallet to another address—while avoiding network mistakes, missing memos/tags, and “rush” scams.
Key takeaways
- Always double-check the network (mistakes are usually irreversible)
- Use a small test transfer for new addresses/networks
- Understand memos/tags (required for some assets/exchanges)
- Verify using TXID + block explorer
- Scammers try to create urgency—slow down
Who this is for
Anyone trying to withdraw crypto for the first time or avoid mistakes when withdrawing to an external wallet.
Withdraw crypto: what “withdraw” actually means
People use “withdraw crypto” to mean two different things:
1) Withdraw crypto to an external wallet (on-chain transfer)
You send crypto from an exchange/broker to a wallet you control (self-custody) or to another address.
2) Withdraw from a crypto wallet to cash (off-ramp)
You sell/swap crypto to fiat using an exchange/off-ramp, then withdraw to a bank/card.
This page focuses mainly on #1 (withdraw to an external wallet), with a short section on #2.
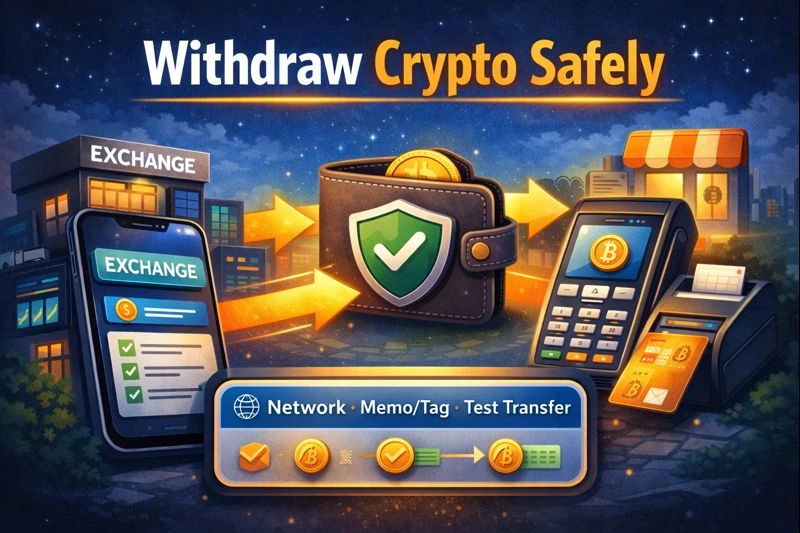
Withdraw crypto safely: the universal checklist
Before you confirm any withdrawal:
- You’re withdrawing the correct asset (e.g., USDT vs USDC)
- You selected the correct network (e.g., ERC-20 vs TRC-20 vs Polygon)
- You copied the destination address from the receiver’s wallet/app
- You checked whether a memo/tag is required (if prompted)
- You considered a test transfer (new address/network)
- You can verify with TXID on a block explorer
Step-by-step: how to withdraw crypto to an external wallet

Step 1 — Decide where you’re withdrawing crypto to
- Your own wallet (recommended for self-custody)
- Another exchange
- A friend/merchant addres
- Not recommended for most cases: withdrawing crypto directly from an exchange to a merchant or service can cause problems—especially with refunds. If a refund is needed, the merchant may not be able to send funds back to the same exchange account (or it may trigger delays, compliance checks, or extra support steps).
- Safer flow: withdraw to your own wallet first, then pay the merchant from your wallet. This keeps refunds simpler and gives you full control over the payment address.
Step 2 — Copy the receiving address from the destination wallet
Open the destination wallet → Receive → copy address.
Safety tip: don’t copy addresses from emails/DMs. Scams often replace addresses.
Step 3 — Double-check the network (the #1 withdraw crypto mistake)
When you withdraw crypto, the network must match what the receiving wallet supports.
If network does not match, your funds won’t show up in the receiving wallet because you sent them on a different network than the wallet is watching. In the worst case, the funds can be effectively lost or require a complex recovery process (sometimes impossible) depending on the wallets, addresses, and platforms involved.
Example: USDT can be withdrawn on multiple networks (ERC-20 / TRC-20 / etc.).
Rule: If you’re unsure, pause and double-check the network before withdrawing—on-chain transactions are final once sent.
Step 4 — Check memos/tags (only if required)
Some assets/exchanges require a memo/tag (common with XRP/XLM and exchange deposit flows).
- If the destination (often an exchange) provides a memo/tag, you must include it.
- If you’re withdrawing to your own self-custody wallet, a memo is usually not needed—but if the platform prompts for it, stop and verify.
Step 5 — Consider a test transfer (recommended)
For a new address or new network:
- Send a small test amount
- Wait for confirmation
- Only then send the rest
Step 6 — Confirm and track your withdrawal (TXID)
After you withdraw crypto:
- Get the TXID / transaction hash
- Check it in a block explorer
- Watch confirmations until completed
Step 7 — Confirm receipt
If you don’t see funds:
- Confirm you’re viewing the correct network
- For tokens, you may need to “add token” in some wallets
- Compare the destination address and the TXID details
Common withdraw crypto errors (and how to avoid them)
Wrong network
Fix: slow down and verify network compatibility before withdrawing. Don’t guess.
Missing memo/tag
Fix: if an exchange gives you a memo/tag, treat it as required.
Address poisoning / copy-paste traps
Fix: check first 4 + last 4 characters; use address book labels; use allowlists when possible.
Rushing (attackers want you stressed)
Fix: Slow down—many scams are designed to put you in a hurry so you skip checks. Most withdrawal mistakes are irreversible, so prioritize accuracy over speed.
Security features that make withdrawing crypto safer (if you use an exchange)
Withdrawal allowlists (whitelists)
If your exchange supports withdrawal allowlists (also called whitelists), enable them and use them consistently. An allowlist restricts withdrawals so that funds can only be sent to pre-approved addresses you’ve explicitly added and confirmed in advance.
This is one of the strongest protections against account takeover. Even if an attacker gains access to your login, password, or even 2FA, they usually won’t be able to withdraw immediately because:
- New withdrawal addresses must be added first
- Address additions often require email confirmations, 2FA, and sometimes a cooling-off period
- Withdrawals may be temporarily locked after changes
Best practice:
- Add your own wallets and frequently used exchange deposit addresses ahead of time
- Label each address clearly (e.g., “Ledger – ETH mainnet”)
- Enable withdrawal delays if available, so changes don’t take effect instantly
This setup trades a bit of convenience for a significant security upgrade.
Alerts
Enable all available security and account alerts, especially for:
- Logins from new devices or locations
- Password changes
- 2FA changes or resets
- Withdrawal requests and completed withdrawals
- API key creation or permission changes
Alerts act as an early warning system. If something happens that you didn’t initiate, speed matters—you want to know immediately so you can freeze the account, contact support, or revoke access before funds are lost.
Tips:
- Use an email address you actively monitor and secure it with strong 2FA
- If possible, enable push notifications or SMS alerts in addition to email
- Treat unexpected alerts as a red flag, even if nothing looks “wrong” yet
Many users only realize their account was compromised after funds are gone. Alerts reduce that window dramatically.
Bonus: minimize personal data (outside KYC)
Complete KYC accurately and honestly when it’s required—this isn’t optional on regulated platforms. However, avoid providing extra personal details that are not strictly necessary.
Why this matters:
- The more personal data tied to your account, the more valuable you become as a phishing or social-engineering target
- Leaked or scraped data can be used to craft highly convincing scam emails, fake support messages, or even impersonation attempts
- In extreme cases, excessive public exposure can increase real-world safety risks
Practical steps:
- Skip optional profile fields that don’t improve security or functionality
- Avoid linking unnecessary social accounts
- Be cautious about sharing holdings, screenshots, or platform names publicly
Less exposed data means fewer angles for attackers—and fewer personalized scams aimed at you.
➡️ Go deeper: Exchange Security Setup
Note on Bitcoin (UTXO + address reuse)
Note on Bitcoin: Bitcoin uses the UTXO model, and most wallets automatically generate a new receiving address to improve privacy. It’s normal (and recommended) to use a new BTC address for each withdrawal.
You can still use a withdrawal allowlist with previously used BTC addresses, but it may reduce your privacy by encouraging address reuse.
How to withdraw from a crypto wallet (wallet → another address)
If you mean “withdraw crypto from my wallet,” you’re usually just sending crypto:
- Choose Send
- Paste destination address
- Pick network (if relevant)
- Confirm fee and details
- Send and track TXID
If you mean “withdraw to my bank,” that’s an off-ramp flow (see below).
How to withdraw crypto to a bank (quick overview)
To “withdraw crypto” to cash you typically:
- Send crypto to an exchange/off-ramp (or buy/sell inside it)
- Sell crypto for fiat
- Withdraw fiat to bank/card
This is platform-specific and changes often, so keep it simple and follow the platform’s official steps.
Platform examples (Binance / Kraken / Revolut / MetaMask)
These are high-level, evergreen steps. Exact buttons change often.
How to withdraw from Binance (to an external wallet)
- Wallet/Assets → Withdraw → Crypto
- Select asset → paste address
- Select network carefully → check memo/tag if prompted
- Test transfer → confirm → track TXID
How to withdraw from Kraken (to an external wallet)
- Withdraw → Add withdrawal address (first time)
- Confirm via email/2FA if required
- Select asset + network → test transfer → track TXID
How to withdraw from Revolut (crypto)
Revolut can behave like a broker/off-ramp depending on region/product:
- If withdrawals to external wallets are supported for your account/asset, the flow is similar: select asset → destination address → network → confirm.
- If not supported, you may only be able to sell to fiat and withdraw fiat.
How to withdraw from MetaMask
MetaMask is a wallet. “Withdraw” usually means:
- Send to another wallet/exchange address, then track TXID
Or “cash out” via an off-ramp provider (varies by location).
Summary
To withdraw crypto safely, focus on what prevents irreversible mistakes: network verification, memo/tag checks when required, and a small test transfer for any new address or network. Track every withdrawal with a TXID and a block explorer, and don’t let urgency (fees, “limited time” prompts, fake support) push you into skipping checks.
For payments, the safest habit is exchange → your wallet → merchant, so you keep control and make refunds simpler.
Next steps
- New to this? Follow First crypto Withdrawal (step-by-step)
- Want to harden your account? Read Exchange Security Setup
- Ready to reduce counterparty risk long-term? Move toward Self-Custody
Java‑certified engineer and P2PStaking CEO, I secure validators across Solana, Polkadot, Kusama, Mina, and Near. My articles reflect hands‑on wallet ops and real recovery drills so you can set up self‑custody safely, step by step.
Withdraw Crypto FAQ
How to withdraw from crypto wallet?
If it’s a self-custody wallet, “withdraw” usually means send: paste the destination address, confirm the network/fee, send, and verify with the TXID.
How to withdraw from Binance / Kraken / Revolut / MetaMask?
The steps are similar: select asset → destination address → correct network → memo/tag (if required) → confirm → track TXID. Buttons differ by platform and region, so always verify in-app.
How to withdraw to an external wallet?
Get the receiving address from your external wallet’s Receive screen, double-check the network, start with a test transfer, and confirm receipt before sending more.
Why is the network so important when I withdraw crypto?
Because the network determines where the funds are sent. A wrong network is one of the most common and costly withdrawal mistakes, and recovery is often difficult or impossible.
What is a memo/tag and when is it required?
A memo/tag is an extra identifier required by some exchanges/assets (often on deposit). If the receiving platform provides one, treat it as mandatory.
Ready to Take Control of Your Crypto?
Go deeper into self‑custody, software wallets, hardware wallets, and practical guides.
